How to Prepare for a Home Inspection
Everything buyers and sellers need to know before inspection day
Last Updated: February 2026
A home inspection is a pivotal moment in any real estate transaction. For buyers, it's your chance to understand exactly what you're purchasing. For sellers, it can make or break your deal. Proper preparation helps ensure the inspection goes smoothly, produces accurate results, and keeps the transaction moving forward.
Whether you're buying or selling, knowing how to prepare for a home inspection gives you an advantage. This guide covers preparation tips for both sides, common mistakes to avoid, and how to use the inspection process strategically.
Part of the Home Inspection Guide
Buyer Preparation: Before the Inspection
As a buyer, the home inspection is one of your most important due diligence steps. Here's how to prepare and get maximum value from the process.
Choose the Right Inspector
Don't just accept the first name your agent suggests—do your homework:
- Verify credentials: Check state license, insurance, and certifications (ASHI, InterNACHI)
- Read reviews: Look for thorough inspectors, not just fast ones
- Ask about experience: Prefer inspectors with hundreds of inspections and years of experience
- Discuss the scope: Confirm what's included and what costs extra
- Get a sample report: Ensure reports are detailed and include photos
Schedule Strategically
- Book early: Schedule within the first few days after offer acceptance
- Allow enough time: Block 3-4 hours to attend the full inspection
- Consider specialty inspections: Order radon, sewer scope, or pest inspections simultaneously if possible
- Plan for follow-up: Leave time before your contingency deadline for additional evaluations if needed
Do Your Homework
Before the inspection, gather information that helps you focus on the right things:
- Review disclosure documents: Note anything the seller has disclosed about the property
- Research the home's age: Older homes have different concerns than newer construction
- Check permit history: Many jurisdictions have online permit records
- Make a list of concerns: Note anything you noticed during showings
- Research common issues: Some areas have specific concerns (radon, termites, foundation problems)
Prepare Your Questions
Write down questions before the inspection so you don't forget to ask:
- What are the major systems' ages and expected lifespans?
- Are there any immediate safety concerns?
- What should I budget for repairs in the first few years?
- What maintenance should I prioritize?
- Are there any signs of past problems (leaks, repairs, modifications)?
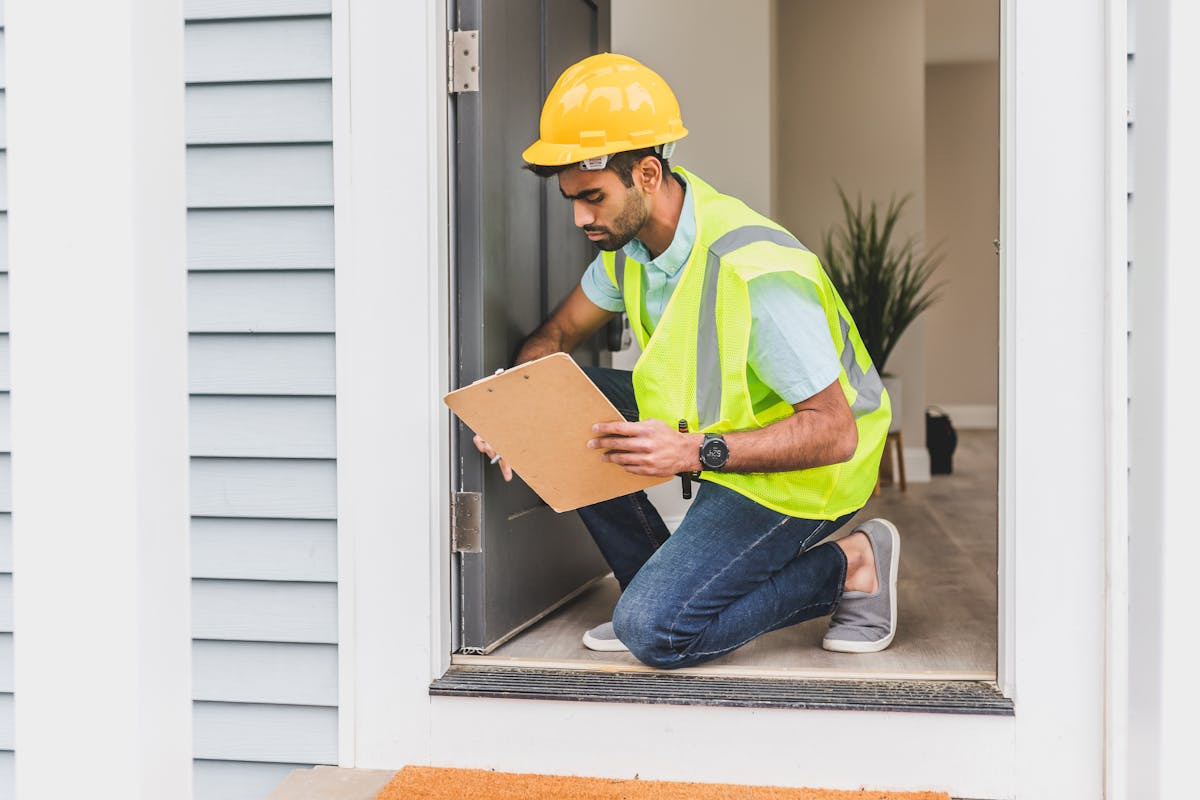
Buyer Preparation: During the Inspection
Attending the inspection is one of the most valuable things you can do as a buyer. Here's how to make the most of it.
What to Bring
- Comfortable shoes: You'll be walking, climbing, and potentially getting dirty
- Notepad or phone: Take your own notes and photos
- Your questions list: Don't rely on memory
- A tape measure: Useful for planning furniture and improvements
- A flashlight: Even though the inspector has one, it's helpful to have your own
How to Participate
- Follow, don't lead: Let the inspector work systematically
- Ask questions at appropriate times: When the inspector pauses or during the final walkthrough
- Take notes: Document what you see and learn
- Take photos: Supplement the report with your own documentation
- Look at everything: Even things that seem fine—this is your future home
- Stay engaged: This isn't passive observation; it's active learning
What to Look For
While the inspector does their job, watch for:
- How the inspector works: Thorough or rushed?
- Red flags: Areas where the inspector spends extra time
- Your own concerns: Things you noticed during showings
- Livability issues: Things that affect daily life, not just the report
- Future projects: Areas you might want to update or improve
Tip: If you can't attend the entire inspection, try to arrive for at least the last 60-90 minutes. This is typically when the inspector summarizes findings and answers questions during the walkthrough.
Questions Buyers Should Ask the Inspector
Use the inspection as a learning opportunity. Here are the most important questions:
About Serious Issues
- "What are the most significant problems you found?"
- "Are there any immediate safety concerns?"
- "What issues would you prioritize if this were your house?"
- "Do any findings require further evaluation by a specialist?"
- "Is there anything that makes you concerned about this property?"
About Major Systems
- "How old is the roof, and how much life does it have left?"
- "What's the age and condition of the HVAC system?"
- "What type of plumbing does the home have, and is it concerning?"
- "Is the electrical system adequate for modern use?"
- "Are there any signs of foundation problems?"
About the Home's History
- "Do you see evidence of past repairs or problems?"
- "Does anything look like unpermitted work?"
- "Are there signs of past water damage or flooding?"
- "Does the home show signs of deferred maintenance?"
About Future Maintenance
- "What maintenance tasks should I prioritize after moving in?"
- "What major expenses should I plan for in the next 5-10 years?"
- "Where are the main shut-offs for water, gas, and electrical?"
- "Are there any seasonal maintenance items I should know about?"
What to Do After the Inspection
Review the Report Carefully
- Read everything: Don't just skim—read the full report
- Study the photos: Pictures often tell more than descriptions
- Note the summary: Focus on items marked as safety hazards or major concerns
- Understand the ratings: Know what "monitor" vs. "repair" vs. "safety concern" means
- Make a priority list: Organize findings by urgency and cost
Get Repair Estimates
For significant issues, get actual quotes from contractors:
- Be specific: Share the relevant pages of the inspection report
- Get multiple quotes: At least 2-3 for major items
- Ask about timing: How urgent is the repair?
- Document everything: Written estimates support your negotiation
Decide on Next Steps
- Request repairs: Ask the seller to fix specific items before closing
- Request credits: Ask for money at closing to handle repairs yourself
- Request price reduction: Lower the purchase price to account for needed work
- Accept as-is: Proceed without requests (appropriate for minor issues)
- Walk away: Exercise your contingency if issues are too significant
Seller Preparation: Getting Your Home Ready
As a seller, a smooth inspection keeps your transaction on track. Poor preparation can lead to unnecessary findings, delayed closings, or killed deals. Here's how to prepare.
The Week Before
Start preparing at least a week before the scheduled inspection:
- Replace all burnt-out light bulbs: Non-working lights get noted
- Check smoke and CO detectors: Replace batteries; ensure they work
- Replace furnace filter: Dirty filters suggest neglected maintenance
- Test all appliances: Run the dishwasher, check the garbage disposal
- Fix dripping faucets: Easy fix that avoids plumbing concerns
- Unstick sticky windows and doors: They'll be tested
- Clear debris from gutters: Clogged gutters raise red flags
- Trim vegetation away from house: Keep plants at least 6 inches from siding
The Day Before
- Clean the house: A clean house makes a better impression
- Remove items from under sinks: Inspectors check plumbing access
- Move items away from water heater: Need 2+ feet of clearance
- Clear access to attic: Remove items from attic stairs or access panels
- Clear basement/crawl space access: Nothing blocking entry
- Ensure electrical panel is accessible: Clear 36 inches of space
- Unlock all doors and gates: Including garage, outbuildings, electrical room
- Secure or remove pets: They can interfere with the inspection
- Leave keys for any locked areas: Or be available to unlock them
Seller Access Checklist
Inspectors must be able to access all areas. Blocked access leads to "unable to inspect" notes in the report, which concerns buyers.
Access Checklist for Sellers
Interior Access
- ☐ Attic access clear and functional
- ☐ Basement/crawl space entry clear
- ☐ Electrical panel accessible (36" clearance)
- ☐ Water heater accessible (2' clearance)
- ☐ HVAC equipment accessible
- ☐ Under-sink cabinets cleared
- ☐ All interior doors unlocked
- ☐ Garage door operable
Utilities
- ☐ Electricity on
- ☐ Gas connected (if applicable)
- ☐ Water on
- ☐ Pilot lights lit
Exterior Access
- ☐ Gates unlocked
- ☐ Fence access to all sides
- ☐ Outbuildings/sheds unlocked
- ☐ Pool equipment accessible
- ☐ AC condenser accessible (2' clearance)
- ☐ Roof access (if ladder needed)
Documentation
- ☐ Appliance manuals
- ☐ Warranty information
- ☐ Permit documentation
- ☐ Recent repair receipts
- ☐ Service records (HVAC, roof, etc.)
Common Issues Sellers Should Fix Before Inspection
These inexpensive fixes prevent unnecessary findings and show buyers the home is well-maintained:
Easy DIY Fixes (Under $50)
- Burnt-out light bulbs: Every single one
- Dripping faucets: Usually just needs new washers
- Running toilets: Often a simple flapper replacement
- Loose doorknobs/cabinet hardware: Just tighten screws
- Missing switch plate covers: Safety issue, easy fix
- Caulking around tubs/showers: Remove mold, recaulk
- Smoke detector batteries: Test and replace
- Furnace filter: Clean or replace
- Weather stripping: Replace if visibly worn
Moderate Fixes ($50-$200)
- GFCI outlets: Required in wet areas; add if missing
- Leaky P-traps: Replace with new plumbing parts
- Sticking windows: Clean tracks, lubricate, adjust
- Gutter cleaning: Clear debris, check downspout extensions
- Grading issues: Add soil to slope away from foundation
- Missing handrails: Safety requirement on stairs
- Deck railing repairs: Tighten or replace loose sections
Professional Repairs ($200+)
Consider hiring professionals for these common issues:
- HVAC tune-up: Shows system has been maintained
- Chimney cleaning: If you have a fireplace
- Roof repairs: Fix obvious damage before inspection
- Electrical issues: Exposed wiring, missing covers, panel problems
- Plumbing leaks: Active leaks under fixtures
What Sellers Should NOT Do
Avoid these common mistakes:
- Don't hide problems: Inspectors will find them, and it damages trust
- Don't make last-minute paint touch-ups: Fresh paint over water stains looks suspicious
- Don't block access: This raises red flags and delays the inspection
- Don't attend the inspection: Let the inspector and buyers work without pressure
- Don't leave pets home: They interfere and may escape
- Don't turn off utilities: All systems must be testable
- Don't argue with findings: Wait for the report and respond professionally
Should Sellers Get a Pre-Listing Inspection?
A pre-listing inspection (also called a seller's inspection) is when you hire an inspector before listing your home. Here's when it makes sense:
Benefits of Pre-Listing Inspections
- No surprises: You know what issues exist before buyers do
- Time to make repairs: Fix problems on your schedule
- Better pricing: Price the home appropriately for its condition
- Negotiating advantage: Disclose known issues upfront to reduce renegotiation
- Faster sales: Buyers may feel more confident with a recent inspection
- Avoid deal killers: Address major issues before they scare off buyers
When Pre-Listing Inspections Make Sense
- Older homes: More likely to have unknown issues
- Estate sales: When you don't know the home's history
- Long-time owners: Things may have changed since you last looked
- Deferred maintenance: If you know upkeep has been neglected
- Competitive markets: Can help your listing stand out
Potential Downsides
- Additional cost: $300-$500 that may not be recovered
- Disclosure requirements: You must disclose known issues
- Buyer may still want their own inspection: Common even with seller inspection
- Findings may require expensive repairs: Or price adjustment
Tip: If getting a pre-listing inspection, schedule it 2-4 weeks before listing. This gives you time to address issues, get repair estimates, and decide how to handle findings in your listing strategy.
Inspection Day Tips for Sellers
What to Do
- Leave the house: Take pets and family elsewhere for 3-4 hours
- Leave documentation out: Appliance manuals, permits, service records
- Leave utilities on: Everything must be testable
- Make yourself available by phone: In case questions arise about access
- Keep a professional attitude: Even if you hear about findings
After the Inspection
- Wait for the formal report: Don't react to informal comments
- Review with your agent: Discuss likely buyer requests
- Get your own estimates: Know the actual repair costs
- Prepare your response: Decide what you're willing to do before negotiating
- Stay calm: Almost every home has findings—it's part of the process
What Happens If Issues Are Found?
When the inspection reveals problems, buyers typically request one of these:
- Repairs: You fix specific items before closing
- Credits: You contribute money at closing for the buyer to make repairs
- Price reduction: The purchase price is lowered
How Sellers Should Respond
- Review the request carefully: Understand exactly what's being asked
- Prioritize safety issues: These are hardest to refuse
- Get actual estimates: Don't agree to inflated repair costs
- Consider credits over repairs: Often simpler for both parties
- Negotiate reasonably: Meeting in the middle keeps deals together
- Document agreements: All changes go in contract amendments
Remember: Most inspection negotiations result in successful deals. Reasonable sellers who address legitimate concerns keep transactions moving forward.
Need Expert Guidance?
An experienced real estate agent helps you prepare for inspections and navigate negotiations professionally.
Find a Local Agent